

7 Kids Play Tent Mistakes Every Parent Makes
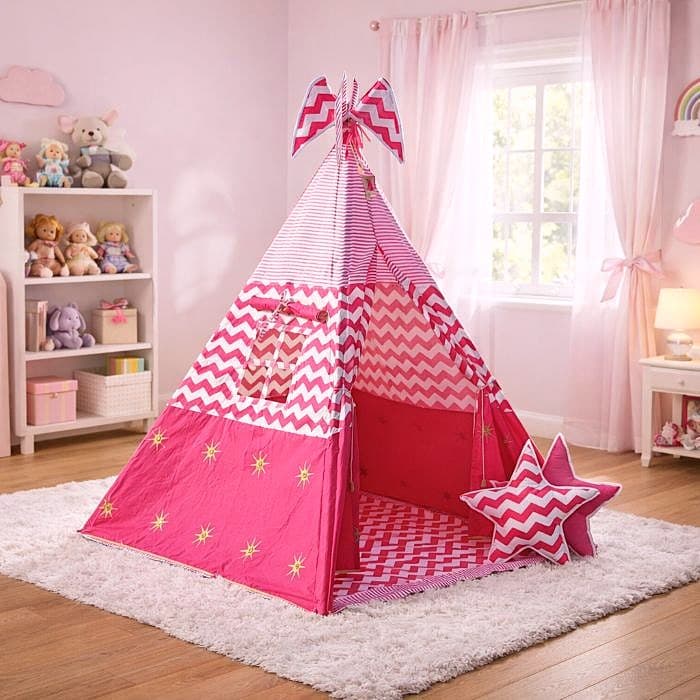
We all want that Pinterest-perfect play corner. Imagine a little teepee tent house with fairy lights, and soft cushions. A happy child curled up inside his or her kids play tent with a picture book. It looks magical. It feels like good parenting.
But here’s the truth nobody tells you before you click “buy” on that affordable, cute-looking kids play tent.
Three months ago, I bought a cheap, “adorable” play tent for my 3-year-old daughter. Within weeks, the poles snapped, the fabric developed a strange chemical smell, and washing it turned into a nightmare that involved YouTube tutorials and a lot of tears (mine). I ended up throwing it away after just 6 weeks.
So before you make the same expensive mistakes, let me walk you through 7 things I wish I knew, not just surface-level tips, but real, detailed lessons about durability, cleaning, safety, and sanity.
1. Durability: Not All Poles Are Created Equal
What I thought initially: “A pole is a pole. It just holds the fabric up. How different can they be?”
What I learned the hard way: Cheap kids play tents almost always use fibre glass or hollow plastic poles. These are lightweight and inexpensive for manufacturers, but they are disastrous for real-world play. My son leaned against the side of the tent while trying to stand up – not even jumping or roughhousing – and the pole snapped with a loud crack, it was dangerously close to my child’s face.
Here’s the deeper truth about pole materials: Fibre glass poles are particularly dangerous because when they may break, they don’t snap cleanly. They might splinter into tiny, invisible shards that can embed in skin or carpet. Hollow plastic poles might not splinter, but they are brittle. In Indian summers, plastic poles may become soft and bendy; in winter, they may become rigid and crack under pressure. Metal poles rust in humid coastal cities like Mumbai or Chennai, and the kids play tent can get uncomfortably hot if left in sunlight.
What you should look for (in detail):
- Bamboo poles – These are eco friendly as well as child friendly material. Bamboo is naturally more tensile than wood or plastic and also flexible (bends without breaking), lightweight, and more eco-friendly than the other options. At Playtents.in, they use treated bamboo that resists termites and mould. Bamboo also has a beautiful natural aesthetic that plastic can never match. The bamboo poles are buffed properly, to remove any uneven edges near the natural knots of the bamboo poles.
- Solid wood poles – Good quality, but heavy and in India, the wooden poles come in 3 pieces, with plastic connectors, that keep breaking and you need to constantly replace them. Also, if you plan to move the tent around frequently (from living room to bedroom to balcony), solid wood becomes a workout.
- Avoid at all costs: Fibre glass (splinter hazard), hollow plastic (snaps easily), and untreated metal (rusts and gets hot).
Pro tip for testing durability: When you receive a kids play tent, try to gently bend each pole by about 10–15 degrees. A good pole will flex and return to shape. A bad pole will feel rigid or make cracking sounds. Also, run your finger along the entire length – if you feel rough seams, ridges, or uneven thickness, that’s a weak spot waiting to fail.
2. Fabric: “Cotton” Doesn’t Always Mean Safe Cotton
What I thought initially: “Cotton is cotton. It’s natural, breathable, and safe. Any kids play tent house labelled ‘cotton’ should be fine.”
What I learned the hard way: The word “cotton” on a product label is often misleading. Many so-called cotton tents are actually cotton-polyester blends – sometimes as little as 30% cotton with 70% polyester. Polyester traps heat and moisture, which means on a warm day, the inside of the tent becomes a humid, uncomfortable sauna. My daughter would come out with red cheeks and sweaty hair after just 15 minutes inside. Worse, some cheap tents are treated with formaldehyde-based anti-wrinkle chemicals or flame retardants that off-gas for weeks. I still remember the sharp, chemical smell when I opened the box like new carpet or a nail salon.
The deeper problem with synthetic blends: Beyond comfort, polyester doesn’t breathe. If a child is playing energetically inside a closed tent, carbon dioxide can build up faster than you’d expect. While this isn’t usually dangerous in a well-ventilated room, it does make the air stale and stuffy. Additionally, polyester is more flammable than cotton (counter-intuitive, but true), so the “flame retardant” chemicals added to some tents are actually making up for the fabric’s natural fire risk.
What you should look for (in detail):
- 100% cotton canvas or muslin – Cotton is breathable and more durable (great for toddlers who pull and tug). Muslin is lighter and more breathable (better for hot climates). Both are excellent.
- No chemical smell – Open the package and sniff immediately. If you smell anything like paint, glue, or cleaning products, the tent has been treated with chemicals. A pure cotton tent should smell like nothing. Or faintly like a new bed sheet.
- The simple test: Take a small corner of the fabric and hold it against your cheek. Close your eyes. Does it feel soft and neutral, like a cotton t-shirt? Or does it feel scratchy, plasticky, or waxy? Your child’s skin is even more sensitive than your cheek. If it doesn’t feel good to you, it will feel worse to them.
3. Cleaning: If You Can’t Wash It, Don’t Buy It
What I thought initially: “I’ll just spot-clean small spills as they happen. How dirty can a play tent really get?”
What I learned the hard way: Within two weeks, my “spot-clean only” tent looked like a crime scene. There was a dried yogurt hand print on one wall, orange marker scribbles on another, a mysterious brown smear (I didn’t want to investigate further), and the floor had absorbed the smell of spilled apple juice. Spot-cleaning with a damp cloth only spread the stains around. I tried a mild soap – that left a soap residue that attracted more dirt. I tried a stain remover – that bleached a faded patch into the fabric. After an hour of scrubbing, the tent looked worse than before, and I was ready to burn it.
The deeper problem with “wipe clean only”: Tents that say “wipe clean” are usually made of coated polyester or treated fabric that cannot handle water immersion. The coating will crack or peel if you try to wash it properly. This means the manufacturer has accepted that their product has a short lifespan. A “wipe clean” tent is designed to be thrown away after a few months. For a product that children use daily, that’s unacceptable.
What you should look for in a kids play tent house
- Machine-washable fabric – Look for explicit instructions that say “machine wash cold, gentle detergent” This means the manufacturer has tested the fabric and dyes to survive water and agitation.
- Removable cover – The best tents have a design where the fabric cover completely separates from the poles. You should be able to unbutton or untie the cover, hand wash gentelly, and leave the pole structure standing in the corner to be used again.
- Air-dry friendly – Never, ever put a play tent in a dryer. The heat will shrink cotton and melt polyester. After washing, hang the cover on a balcony clothesline or over a shower rod. It should dry completely within 6–8 hours in good weather.
Detailed washing instructions for cotton tents:
- Close all velcro or button closures before washing (prevents snagging).
- Use cold water only – hot water shrinks cotton and sets stains.
- Use a mild, fragrance-free detergent (baby-safe brands are best).
- Skip fabric softener – it coats the fibres and reduces breath ability.
- Try to hand wash and dry flat, avoid drying in the sun.
- Dry immediately. Do not leave wet fabric bunched up, it will develop mildew smell within 10 to 14 hours.
4. Safety: The Hidden Dangers You Can’t See
What I thought initially: “It’s just a fabric tent with some sticks. How dangerous can it possibly be?”
What I learned the hard way: I learned about five hidden safety risks, and three of them scared me badly. First, my daughter discovered the long decorative cords on the front of the kids play tent and started wrapping them around her neck like a necklace while playing “princess.” I caught her just in time. Second, a stitched-on felt flower had a small plastic bead in the center. That bead popped off one day, and I found it in her mouth. Third, the plastic pole connectors had rough mold seams – she ran her hand along them and got a paper-cut-like gash on her finger. Blood on the white tent. That was the moment I threw that tent away.
The five hidden safety risks (detailed):
1. Strangulation hazards from cords: Any cord longer than 7 inches (about 18 cm) is a potential strangulation risk for children under 4. Children love wrapping things around their necks, necklaces, ribbons, drawstrings. Many decorative tents have long tie-backs for the front flaps. These should be either removed, shortened, or secured so they cannot form a loop.
2. Choking hazards from small parts: Beads, buttons, sequins, tassels, or plastic decorations that are glued or loosely stitched will eventually come off. A 2-year-old’s mouth is like a vacuum cleaner for small objects. If a decoration is smaller than a 50 paise coin, it’s a choking hazard. If it’s attached with glue alone, assume it will fall off within a month.
3. Toxic flame retardants and chemicals: This is the hidden danger you cannot see or smell. Some cheap tents are sprayed with chemical flame retardants (like PBDEs or organophosphates) to meet fire safety standards for children’s products. Studies have linked these chemicals to hormone disruption, thyroid issues, and developmental delays. The irony is that 100% cotton is naturally less flammable than synthetics, so a good quality cotton kids play tent house doesn’t need these toxic sprays.
4. Sharp pole joints and connectors: Where poles connect to each other or to the fabric, cheap tents use plastic or metal joints that are molded with rough seams. Run your finger over every joint and connector. If you feel any sharp edge, ridge, or burr, it will eventually cut a child’s finger, or worse, a child falling onto a sharp joint could get a puncture wound.
5. Tip-over and entrapment risks: A kids play tent house that is too tall for its base width will tip over when a child leans against the side. A general rule: the base should be at least 2/3 of the height. So a 4-foot tall tent needs a base at least 2.5 feet wide. Additionally, ensure there is ventilation, a play tent that zips completely closed should have mesh windows or gaps for airflow to prevent carbon dioxide buildup.
What you should look for (detailed checklist):
- No internal cords longer than 7 inches. If the tent comes with long tie-backs, cut them short or tie them in a permanent knot so they cannot form a loop.
- Stitched-on decorations only. Run your finger under every decoration. If you can slide a fingernail under the edge, it’s not securely attached. Decorations should be double-stitched, not glued.
- Rounded, sanded joints. The manufacturer should explicitly state that all pole ends and connectors are sanded smooth. Ask for photos if needed.
- Wide, stable base. Measure the base dimensions. If the tent is marketed for ages 3+, the base should be at least 3 feet in diameter or width.
- Certifications. Ask the seller for safety testing reports: ASTM F963 (US standard) or EN71 (European standard) for toys. If they cannot provide these, do not buy.
The parent’s safety routine: Once a month, do a 5-minute safety inspection. Check every cord, every decoration, every pole joint, and every seam. If anything feels loose, sharp, or worn, repair or replace the tent immediately.
5. Size: Bigger Is NOT Better for Small Homes
What I thought initially: “I’ll buy a large tent so she can grow into it. It’s better to have too much space than too little.”
What I learned the hard way: I bought a 5-foot tall teepee tent house that was marketed for “ages 3–8.” It arrived and immediately ate my entire living room. The base was 4 feet wide, which meant I couldn’t walk around it. It blocked the TV, blocked the balcony door, and became a permanent obstacle course. My 3-year-old daughter, who I thought would love the “big girl tent,” was actually scared of it. She said it was “too dark” and “too big” and refused to go inside. The tent sat in the corner for 3 weeks, then I moved it to the bedroom, then to the storage room, then to the trash.
The deeper problem with oversized tents: Children actually feel more secure in smaller, cozier spaces. This is why kids love cardboard boxes – the enclosure feels safe and contained. A tent that is too large feels cavernous and intimidating. Additionally, a large tent requires large floor space. In Indian homes – whether a 1BHK in Mumbai or a 2BHK in Bangalore – floor space is precious. A tent that cannot fold down flat will become a permanent piece of “clutter furniture.”
Detailed size guide by age and home type:
For ages 1–3 years:
- Height: 3.5 to 4 feet
- Base: 2.5 to 3 feet wide
- Why: At this age, children sit and crawl. They don’t need to stand inside. A smaller tent feels like a cozy den. A parent can sit hunched inside for brief periods (story time, tea parties).
For ages 3–6 years:
- Height: 4 to 4.5 feet
- Base: 3 to 3.5 feet wide
- Why: This is the sweet spot. Tall enough for a parent to sit relatively comfortably. Small enough to fit in most living room corners. Children at this age start wanting to stand inside, but they also still enjoy the cozy feeling.
For ages 6+ years:
- Height: 5+ feet
- Base: 4+ feet wide
- Why: Honestly, by age 6, many children prefer blanket forts or outdoor play. If you buy a tent this large, treat it as a “room divider” or permanent play structure. Know that it will dominate your floor plan.
The storage test: Before buying any tent, ask yourself: “Can I fold this flat in 30 seconds without tools?” The best tents use collapsible bamboo poles that fold like a tripod. Pop-down tents (like the pop-up laundry hampers) are even easier – they fold into a flat circle in 2 seconds. If the tent requires unscrewing poles or removing connectors, you will never put it away. It will live permanently on your floor.
Space-saving tip for small apartments: Look for a corner-fit kids play tent house. Some teepee designs are triangular and fit perfectly into a corner, taking up less visual space. Alternatively, consider a low-profile play mat tent – essentially a canopy that hangs from a single ceiling hook, with fabric draping to the floor. These take up zero floor space when not in use (just unhook and fold).
6. Assembly: “Easy Assembly” Is Usually a Lie
What I thought initially: “Every product says ‘easy assembly.’ How hard can threading a few poles into some fabric loops be?”
What I learned the hard way: I bought a tent that came with 47 steps in the instruction manual. There were tiny plastic screws, metal washers that kept falling on the floor, and fabric loops that didn’t line up with the pole holes. The diagram showed an arrow pointing from a screw to a hole – but there were 12 screws and 14 holes, so I had to guess. I spent two hours sweating, swearing, and watching a YouTube assembly video made by someone who had clearly given up halfway through. When I finally finished, the tent was crooked and the door wouldn’t close properly.
The deeper problem with bad assembly design: Manufacturers who cut costs on design create complicated assembly processes. They use generic pole-and-sleeve systems without considering how a parent will actually put the thing together. Good design is invisible – you don’t notice it because it just works. Bad design announces itself with every frustrating step. If a tent takes more than 10 minutes to assemble on your first try, that’s a design failure, not a user error.
What to look for (detailed features of good assembly):
No tools required: The best kids play tent house requires zero tools. No screwdrivers, no hex keys, no hammers. All connections should snap, slide, or tie by hand. If you see “screws” or “bolts” in the product photos, keep scrolling.
Pre-attached pole sleeves: This is a huge time-saver. Some tents have open channels or fabric tunnels that the poles slide into. Better tents have sleeves that are sewn closed at one end, so the pole has a natural stopping point. Best tents have color-coded sleeves and poles – red pole slides into red sleeve, blue into blue. This eliminates all guesswork.
Shock-corded poles (like camping tents): Some premium play tents use shock cords – elastic strings inside hollow poles that allow the poles to fold into a chain. You just unfold the chain, click the sections together, and the poles self-assemble. This is the same technology used in expensive camping tents. It’s brilliant for play tents but rare.
The 5-minute rule: Ask yourself honestly: can I set this up alone, without help, on my first try, in under 15 minutes? If the answer is no, the design is bad. At Playtents.in, they timed their assembly process – average is 10 minutes. That’s acceptable.
What to do if assembly is frustrating: Stop. Don’t force anything. Forcing will break poles or tear fabric. Instead, lay all parts on the floor and identify every piece before starting. Watch the brand’s official assembly video (if they don’t have one, that’s a red flag). If still stuck, contact customer service. A good brand will respond within 24 hours with help.
7. Price: Cheap Costs More in the Long Run
What I thought initially: “It’s just a kids’ tent. My child will outgrow it in a year anyway. Why spend ₹5,000 when I can spend ₹500?”
What I learned the hard way: My ₹500 tent lasted exactly 6 weeks. The fabric tore at a seam. The poles snapped. The “cotton” turned out to be a polyester blend that pilled and looked terrible after one wash. I threw it away. Then I bought another cheap tent – ₹1,200 this time. That one lasted 8 weeks before the zipper broke. I was now ₹2,100 in and had nothing to show for it. Meanwhile, my friend bought a ₹5,000 tent from a quality brand. Two years and two kids later, it’s still standing. She washes it monthly. It looks gently used but perfectly functional.
The real cost breakdown (detailed):
| Price point | Lifespan | Cost per month | Hidden costs | Emotional cost |
|---|---|---|---|---|
| Under ₹1,000 | 4–8 weeks | ₹125–250 | Replacement, frustration, safety risks | High – constant disappointment |
| ₹1,000–2,000 | 2–4 months | ₹250–500 | Spot cleaners, stain removers, eventual replacement | Medium – nagging annoyance |
| ₹2,000–3,500 | 6–12 months | ₹170–580 | Minimal – occasional sewing of loose threads | Low – satisfaction |
| ₹5,000–8,000 | 3-4 years | ₹50–100 | None if cared for properly | Very low – peace of mind |
Where to spend money (the value items):
1. Fabric quality (40% of your budget): Spend on 100% cotton, preferably canvas weight. This determines breath ability, comfort, and washability. Cheap fabric pills, fades, and tears. Good fabric lasts years.
2. Pole material (30% of your budget): Bamboo is worth every rupee. Fiberglass, rigid wood and hollow plastic are designed to fail. Good poles are the skeleton of the tent – if they fail, the tent is useless.
3. Stitching and seams (15% of your budget): Double-stitched seams, reinforced stress points (corners and pole pockets), and bartacks (small tight zigzag stitches at high-stress areas) indicate quality. Single stitching will unravel within months.
4. Safety certifications (10% of your budget): ASTM or EN71 testing costs manufacturers money. A tent with these certifications has been tested for small parts, sharp edges, toxic materials, and flammability. That testing fee is a bargain for your child’s safety.
5. Brand reputation (5% of your budget): A brand that answers emails, offers support, and has real customer photos is worth a small premium. A brand with no website, no customer service, and only stock photos is a gamble.
Where to save money (the waste items):
- Fancy lights or battery packs: Buy these separately at a local market for 1/3 the price.
- Licensed cartoon characters (Disney, Marvel, Paw Patrol): You’re paying ₹1,000+ for a logo. The tent itself is usually lower quality because the license fee ate the budget.
- Extra Pillows and cushions: Do not buy extra cushions. Only take the cushions that come along with your Kids Tent.
- Personalized name Accessories: A nice touch of Name on the kids tent house or pillows is nice. But do not pay extra to add your child’s name on all accessories. Save this for the second tent if the first one survives.
The long-term financial logic: A good quality tent that costs ₹5,000 and lasts 3+ years is a very good investment. A cheap tent that costs ₹1,200 and lasts 2 months costs you ₹600 per month. The cheap tent is 3.6 times more expensive per month of use. And that doesn’t include the cost of your frustration, your child’s potential safety risks, or the environmental waste of throwing away plastic products every few months.
Final financial advice: If your budget is tight, wait and save for a quality tent. Or buy a used quality tent from a resale group (many children outgrow tents in perfect condition). Do not buy a new cheap tent. Cheap new is almost always worse than quality used.
Final Verdict: What I Would Do Differently (Detailed)
If I could go back in time with what I know now, here is exactly what I would do:
Step 1: I would ignore any play tent under ₹3,500. That price floor filters out fiberglass poles, synthetic blends, and unsafe decorations.
Step 2: I would search specifically for “100% cotton” and “bamboo poles” – not “cotton blend,” not “wood style.” These two materials solve 80% of durability and safety problems.
Step 3: I would contact the seller and ask three questions:
- “Is this kids tent house washable?”
- “Are there any small parts (beads, buttons, tassels) that could come off?”
- “Can you send a photo of the pole joints showing they are sanded smooth?”
Step 4: I would measure my floor space before buying. I would mark the tent’s footprint with masking tape on my floor and leave it there for 24 hours. If I tripped over the tape or found it annoying, I would buy a smaller tent.
Step 5: I would buy from a known brand that offers to share some happy client pictures, without editing or filters.
Step 6: When the tent arrives, I would do the safety inspection before letting my child play.
Step 7: I would set a calendar reminder for the first of every month: “Inspect tent – cords, seams, poles, decorations.”
Real talk from a parent: So finally I bought a teepee tent for 5 year old girl. The fabric was good quality cotton, the stitching was excellent. There is attention to details with reinforcement, at the edges and where ever required. The teepee tent house includes very good quality bamboo poles with metal socket joints. At Playtents.in, they design their kids tents to survive a wash every 2–4 months. Because kids are wonderfully messy. Marker art, food smears, paint spills, diaper leaks – it all ends up on the tent. A tent you can’t wash is a tent you’ll eventually hate. Though they strongly recommend First time Dry clean, to preserve colours, and then from 2nd time onwards you can hand wash in a mild detergent.

Today, my daughter plays in a Playtents.in teepee. It has been 8 months. It has survived juice spills, marker art (washable, thankfully), a puppy who used it as a chew toy (the bamboo survived), and one very aggressive tea party with 47 stuffed animals. It still looks new. It still smells like cotton, not chemicals. And I sleep better knowing I’m not worrying about any dangerous parts or choking hazards.
Conclusion
Don’t learn the hard way like I did. Invest in a premium quality kids play tent house. Buy once. Buy safe. Buy peace on mind!